2. Basic rhythm and sequencing
TUTORIAL 002 - Basic rhythm and sequencing
This tutorial introduces some methods for sequencing your sounds into rhythms and otherwise scheduling events in nonrealtime with pippi.
As usual, lets import the dsp module from pippi first.
from pippi import dsp
The Dub Pattern
With a few exceptions, pippi doesn't really follow a conventional unit generator pattern where a DSP graph is formed and all inputs flow to all outputs over a series of block computations. That's a very useful (and old!) pattern which works very well for realtime systems because the latency of your system is basically fixed. Whatever you can finish computing in a single block of samples is the limit of the system, and also the limit of the responsiveness of the system.
Non-realtime systems make time and scheduling much easier to reason about because you don't need to worry about doing operations in sequence, on-demand, and in context. Time travel is real in non-realtime systems!
So, essentially all forms of sequencing in pippi consist of just copying the values from one part of one buffer onto the values from another section of a different buffer. This can happen at all sorts of levels and a useful pattern for doing it is basically just to write a simple while loop in python.
Before we demonstrate the dub pattern, lets take a sidebar and put together a basic hi hat generator, so we have something to sequence.
A hat synth
We'll get some more into synthesis in future tutorials, but for fun lets demonstrate
the dub pattern by synthesizing some percussion-ish sounds with the noise module.
This module has basic band-limited noise generation available with noise.bln(). It
will choose a new random frequency (within a range you specify) on every period of an oscillating
wavetable synth. Every cycle of the sinewave will jump discretely from frequency to frequency
smoothly on the edge of each cycle / waveset / period. Those frequency boundries can also be
curves to create filter-sweep-like shapes over time.
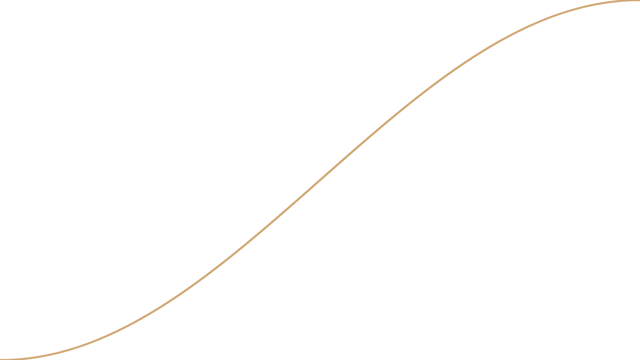
Lets make a hi hat type sound by synthesizing 80ms of sine wavesets scattered between 9,000 and 12,000 hz to between 11,000 and 14,000 hz over the shape of the right half of a hanning window.
That maybe sounds like a lot but we'll do it in pretty small bits. First, the curves!
The lower end of the hi hat will go from 9khz to 11khz and the upper end of the hi hat will
go from 12khz to 14khz over the hannin curve shape pictured below.
lowhz = dsp.win('hannin', 9000, 11000)
highhz = dsp.win('hannin', 12000, 14000)

# Graph it
lowhz.graph('docs/tutorials/figures/002-hann-curve.png')

Now lets make 80ms of noise with that frequency boundry curve and give it an
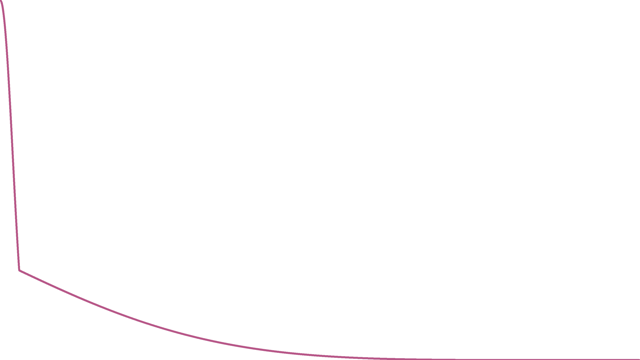
amplitude envelope with a sharp attack as well. The pluckout built-in wavetable
is pretty good for this. It's got a sharp attack (no attack at all actually) and a
quick decay into a long, quiet tail. It looks like this:
pluckout = dsp.win('pluckout')
pluckout.graph('docs/tutorials/figures/002-pluckout.png')

from pippi import noise

hat = noise.bln('sine', dsp.MS*80, lowhz, highhz)
hat = hat.env(pluckout) * 0.5 # Also multiply by 0.5 to reduce the amplitude of the signal by half
hat.write('docs/tutorials/renders/002-plucked-hat.flac')
We'll wrap it in a function to make it easy to reuse later on. Lets also make the curve shape of the frequency boundries change to a different shape each time the function is called and a single hat sound is rendered, to give it a little bit of a shimmery imperfect feel. We'll also accept a length param to be able to vary the length of the hat.
Note: Keep in mind the amplitude envelope is a fixed size and so as the hat length varies, the character of the envelope will change with it. The decay time will be longer for longer sounds, etc. To maintain a fixed decay time over a variable length, one other approach would be to generate a new ADSR envelope (recall SoundBuffer.adsr() from the first tutorial!) for each hat, and give it a fixed decay time. We'll get into many more ways to generate wavetable shapes that can be used for amplitude envelopes and all sorts of other stuff in future tutorials.
def makehat(length=dsp.MS*80):
    lowhz = dsp.win('rnd', 9000, 11000)
    highhz = dsp.win('rnd', 12000, 14000)
    return noise.bln('sine', length, lowhz, highhz).env(pluckout) * 0.5
Lining up the hats in a row
Ok, now that we can make a hi hat sound on demand, lets try sequencing a series of hi hat hits in a row, evenly spaced at half-second intervals, and vary the length of the hat randomly from 100ms to 1s as we go.
For this simple but very useful form of the dub pattern, we'll keep track of our position inside the buffer as we go, and dub our hat sounds into it as we go.
Now we can loop until we get to the end of the 30 second buffer, advancing the time in our elapsed
variable by a half second to sequence it in time.
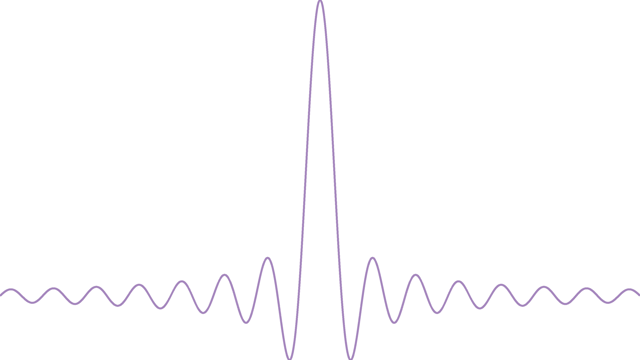
Instead of just randomly picking a length for our hats, lets have them sample a point in a curve as they go to demonstrate a very easy way to create LFO controls.
lfo = dsp.win('sinc', 0.1, 1) # Hat lengths between 100ms and 1s over a sinc window
lfo.graph('docs/tutorials/figures/002-sinc-win.png', label='sinc window')

out = dsp.buffer(length=30)

elapsed = 0
while elapsed < 30:
    pos = elapsed / 30 # position in the buffer between 0 and 1
    hatlength = lfo.interp(pos) # Sample the current interpolated position in the curve to get the hat length
    hat = makehat(hatlength)
    out.dub(hat, elapsed) # Finally, we dub the hat into the output buffer at the current time
    elapsed += 0.5 # and move our position forward again a half second so we can do it all again!

out.write('docs/tutorials/renders/002-hats-on-ice.flac')

Behold! Our fabulous hi hats:
Smearing the hats across time
Pretty boring but it can keep a steady beat! Before we introduce some other sequencing tools, I want to
point out that this pattern might seem obvious and simplistic, but it's a very powerful way to design a
custom algorithm for moving back and forth in time during your render process. You can add or subtract from
elapsed to control the direction, leap from one point in time to another based on for example the pitch of
the current note... for a simple example instead of using a fixed 0.5 second accumulator, lets create a new lfo
and modulate the amount of time that elapses on each render iteration.
from pippi import fx # The hats sound nice with a butterworth lowpass

length_lfo = dsp.win('sinc', 0.1, 1)
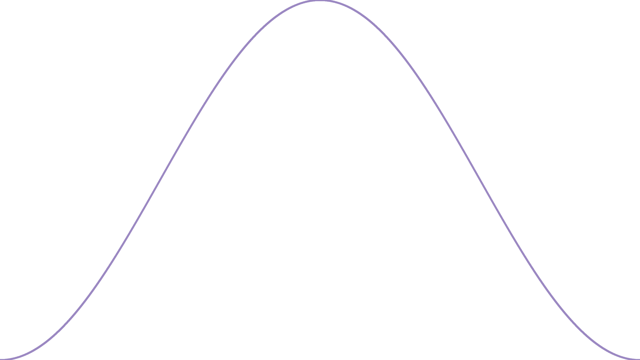
time_lfo = dsp.win('hann', 0.001, 0.2) # Time increments between 1ms and 200ms over a sinc curve
time_lfo.graph('docs/tutorials/figures/002-time-lfo.png', label='time lfo')

out = dsp.buffer(length=30) # Otherwise we'll keep adding to our last buffer

elapsed = 0 # reset the clock
while elapsed < 30:
    # Our relative position in the buffer from 0 to 1
    pos = elapsed / 30

    # The length of the hat sound, sampled from the value of a sinc curve
    # at the current position in the output buffer
    hatlength = length_lfo.interp(pos)

    # Call out hi hat function which returns a SoundBuffer
    hat = makehat(hatlength)

    # Dub the hi hat sound into our output buffer at the current position in seconds
    out.dub(hat, elapsed)

    # Sample a length from the time_lfo at this position to determine how far ahead to
    # move before the loop comes back around to dub another hat.
    beat = time_lfo.interp(pos)
    elapsed += beat

# Add a butterworth lowpass with a 3k cutoff -- multiply output by 0.5 to attenuate signal to 50%
out = fx.lpf(out, 3000) * 0.5
out.write('docs/tutorials/renders/002-hats-slipping-on-ice.flac')
Here's our time LFO:

And our irregular sequence of hi hats:
A rhythmic smear of hats, and a kick
Lets try something similar that suggests a more regular pattern.
First, here's another function to generate a simple kick drum type sound that adds a bit
of bite with bitcrushing and a lowpass filter from the fx module.
def makekick(length=0.25):
    out = noise.bln('square', length, [dsp.rand(80, 100), dsp.rand(50, 100)], [dsp.rand(150, 200), dsp.rand(50, 70)])
    out = fx.fold(out, amp=dsp.win('saw', 1, dsp.rand(6,10)))
    out = fx.lpf(out, 200).vspeed([1, 0.5])
    return out.env('pluckout').taper(0.02) * dsp.rand(0.6, 1)
It sounds like this:
kick = dsp.join([ makekick().pad(end=0.2) for _ in range(8) ]) # render a few kicks
kick.write('docs/tutorials/renders/002-kick.flac')
Ok, ok lets make a basic clap type sound too.
def makeclap(length=dsp.MS*80):
    lowhz = dsp.win('rnd', 3000, 6000)
    highhz = dsp.win('rnd', 2000, 8000)
    return noise.bln('tri', length, lowhz, highhz).env(pluckout)

clap = dsp.join([ makeclap().pad(end=0.2) for _ in range(8) ]) # render a few claps
clap.write('docs/tutorials/renders/002-clap.flac')
Lets say we want to make a pattern that has a five beat groove. We can adapt our approaches above to play a kick once every five beats, a smear of hats that coalesce over a period of six beats, phasing against the 5 beat kicks while another layer of hats keep the beat. Ready?
from pippi import shapes

hat_lfo = dsp.win(shapes.win('sine'), 0.01, 1.1) # More on the shapes module later...
clap_lfo = dsp.win(shapes.win('sine'), 0.01, 0.1)
kick_lfo = dsp.win(shapes.win('sine'), 0.05, 0.1) # A variation for the kicks
time_lfo = dsp.win('hann', 0.001, 0.2) # We'll use the same LFO for the hat smears, but in a different way...
out = dsp.buffer(length=30)
hats = dsp.buffer(length=30)

# We'll say a beat is 200ms
beat = 0.2

# First, lay down the kicks
elapsed = 0
while elapsed < 30:
    pos = elapsed / 30
    kicklength = kick_lfo.interp(pos)
    kick = makekick(kicklength)
    out.dub(kick, elapsed)

    # A little trick to sometimes add a second quieter
    # follow-on kick half a beat after the first
    if dsp.rand() > 0.95:
        kick = makekick(kicklength) * dsp.rand(0.5, 0.8)
        out.dub(kick, elapsed + (beat/2))

    # Move the position forward again...
    elapsed += beat * 5

# Now the hats
elapsed = 0
while elapsed < 30:
    pos = elapsed / 30
    hatlength = hat_lfo.interp(pos)
    hat = makehat(hatlength)
    hats.dub(hat, elapsed)
    elapsed += beat

# Now the claps
elapsed = beat * 2
while elapsed < 30:
    pos = elapsed / 30
    claplength = clap_lfo.interp(pos)
    clap = makeclap(claplength)
    hats.dub(clap, elapsed)
    elapsed += beat * 3


# Now the smeary-hats
elapsed = 0
phase = 0
beatsix = beat * 6 # We'll mess with the beat, so store the original for later
while elapsed < 30:
    hatlength = hat_lfo.interp(elapsed / 30)
    hat = makehat(hatlength) * 0.2 # Turn the smears down a bit
    hats.dub(hat, elapsed)

    # We're reading through the time LFO every 6
    # beats by keeping a phase for the LFO and
    # resetting it if it overflows
    beat = time_lfo.interp(phase / beatsix)
    elapsed += beat
    phase += beat

    if phase > beatsix:
        phase -= beatsix

# Add a butterworth lowpass with a 3k cutoff
hats = fx.lpf(hats, 3000)

# Mix the kicks and the hats
out.dub(hats)
out.write('docs/tutorials/renders/002-kicks-and-hats-together.flac')
Now this is starting to sound a little more interesting:
Pattern strings
I like the phasing of the rhythms, but this doesn't really feel like a groove in 5 beats right now.
Before we try to fix that, lets take a look at one possible way to sequence patterns in pippi.
Our current approach works pretty well for sequencing a regular stream of events, but what if we wanted
to sequence an irregular pattern of events? For example lets say each ASCII character in the diagram below
represents half a beat (in common music notation this would be called an 8th note) and write out the first hat pattern
we sequenced above. An x is an event, and a . is a silence or a rest.
x.x.x.x.
In our original sequence, this pattern didn't have a length, it is simply a fixed amount of time that represents the interval at which we should plop down our hat sound into an output buffer.
But what if we wanted to do something like this?
xx.xx..x
One way to accomplish this could be to actually use the ASCII string above as a simple score. We'll count each beat as it passes and use that count to look at the corresponding character in the string and treat it like a lookup table which will decide if we plop down a hat, or scoot along and leave a bit of silence instead.
# Keep track of the position in seconds so we know where to dub
elapsed = 0

# Our new magic value which will increment on each beat of the underlying grid of 1/8th notes
count = 0

# Our quarter note beat was 0.5 seconds, but we want to switch to a grid of 8th notes
beat = 0.5 / 2

# Literally just a python string, nothing fancy
pat = 'xx.xx..x'

out = dsp.buffer(length=30)

while elapsed < 30:
    # By taking the modulo (%) of the count and using that
    # to index into the pattern string, we can loop through
    # it forever and use it to decide if we want to make a hat or silence
    if pat[count % len(pat)] == 'x':
        # Keep it simple and make each hat 1 second long
        out.dub(makehat(1), elapsed)

    # Move time forward along the beat grid of 1/8th notes
    # and increment our beat counter
    elapsed += beat
    count += 1

out.write('docs/tutorials/renders/002-a-hat-pattern.flac')
This basic idea is actually pretty useful, and there are some helpers in pippi for working with pattern strings like this, including a drum machine abstraction which also eliminates most of the dub pattern boilerplate for you.
There is a trade-off: the drum machine is much more quick to set up and use for many common use cases, but the dub pattern is much more flexible for specialized sequencing.
A drum machine
One of the helpers we can use to parse pattern strings is the drum machine abstraction available
via the rhythm module.
Making a new drum machine is pretty straightforward, there is only one param: the beat length in
seconds. Lets start with 88bpm for now, which can be expressed in terms of seconds as 60 / 88
or just as 0.6818 seconds. This will designate the underlying rhythmic grid for the sequencer.
from pippi import rhythm

# Create a new Seq drum machine instance
beat = 60 / 88 # 88 beats per minute in seconds
dm = rhythm.Seq(beat)

# Lets make a new hi hat pattern
# ...and patterns for our other instruments
hatpat = 'xxx.x..x.'
kikpat = 'x.x..'
clapat = '.x..x'
Before we can add these new patterns to the drum machine, we need to adjust our
drum generator functions to use a signature compatible with the drum machine.
Seq callbacks pass a ctx dict with some helpful state we can use. pos is a float between 0 and 1)
We'll use the pos value in our callback to know at what point to sample an interpolated value from our various LFOs.
Our new callbacks:
hat_lfo = dsp.win(shapes.win('sine'), 0.01, 1.1)
kick_lfo = dsp.win(shapes.win('sine'), 0.05, 0.1)
clap_lfo = dsp.win(shapes.win('sine'), 0.01, 0.1)
time_lfo = dsp.win('hann', 0.001, 0.2)

def makehat(ctx):
    length = hat_lfo.interp(ctx.pos)
    lowhz = dsp.win('rnd', 9000, 11000)
    highhz = dsp.win('rnd', 12000, 14000)
    return noise.bln('sine', length, lowhz, highhz).env('pluckout') * 0.5

def makekick(ctx):
    length = kick_lfo.interp(ctx.pos)
    out = noise.bln('square', length, [dsp.rand(80, 100), dsp.rand(50, 100)], [dsp.rand(150, 200), dsp.rand(50, 70)])
    out = fx.crush(out, dsp.rand(6,10), dsp.rand(11000, 44100))
    out = fx.lpf(out, 200).vspeed([1, 0.5])
    return out.env('pluckout').taper(0.02) * dsp.rand(0.6, 1)

def makeclap(ctx):
    length = clap_lfo.interp(ctx.pos)
    lowhz = dsp.win('rnd', 3000, 6000)
    highhz = dsp.win('rnd', 2000, 8000)
    return noise.bln('tri', length, lowhz, highhz).env('pluckout')
To add patterns and tell the Seq what to do with them, we'll call
add(), give them an arbitrary name (so we can do things like update params between renders)
as well as: a pattern string, a reference to the function callback that actually
generates the sound, and (to start) a div param, which can be used to scale the grid
per instrument based on the drum machine's tempo.
Lets set the hi hats to a grid of 16th notes or a div value of 4 (a quarter note divided by four) and the others to 8th notes or a div value of 2 which will set the width of the underlying grid each instrument's patterns will be sequenced over.
Note: zeros aren't allowed but fractional values (
1.2,3/4,math.pi, etc) fordivcan be given for easy phasing and oddball polyrhythms.
dm.add('h', hatpat, makehat, div=4)
dm.add('k', kikpat, makekick, div=2)
dm.add('c', clapat, makeclap, div=2)

# Render 30 seconds of what we have so far...
out = dm.play(30)
out.write('docs/tutorials/renders/002-drum-machine-1.flac')
The master tempo grid can be given as a curve:
beat = dsp.win('hannout', 0.02, 1)
dm = rhythm.Seq(beat)
dm.add('h', hatpat, makehat, div=4)
dm.add('k', kikpat, makekick, div=2)
dm.add('c', clapat, makeclap, div=2)
dm.add('s', 'xxxx', makehat, div=4)
out = dm.play(30)
out.write('docs/tutorials/renders/002-drum-machine-2.flac')
Or you can add a smear multiplier which will be sampled on every beat, and
used as a multipler for the beat. This multiplies the beat for the second channel
of hats named s here by 0.5 or half speed at first, and then moves upward through
a sampled half-hann window shape until it gets the beat up to three times its original speed
by the end of the render.
beat = 60 / 88
smear = dsp.win('hannin', 0.5, 3)
dm = rhythm.Seq(beat)
dm.add('h', hatpat, makehat, div=4)
dm.add('k', kikpat, makekick, div=2)
dm.add('c', clapat, makeclap, div=2)
dm.add('s', 'xxxx', makehat, div=4, smear=smear)
out = dm.play(30)
out.write('docs/tutorials/renders/002-drum-machine-3.flac')